
Brake fluid should be changed every two years, but it’s often neglected, even though old brake fluid in your motorcycle can put your life at risk. Old brake fluid negatively impact stopping power and braking distance, lead to bad feedback from the brakes, so here’s how to bleed the brakes on a Honda Fury yourself so you can save some money and stay safe.
Here’s what you’ll need to bleed your Honda Fury brakes:
There are a few ways to bleed the brakes on a Honda Fury. You can keep it for almost no money with a hose and a water bottle, or you can go all-out and buy an air compressor and special equipment. The way I recommend is somewhere between the two and takes minimal investment while still getting easy results.
Here’s what I recommend:
- Brake bleeder kit: The kit works with a variety of vehicles. It will fit everything from a 50cc Vespa, to a 1300cc Honda Fury to my 5.4 litre Ford F-150 pickup truck. It uses a one-way valve so that air can’t enter the system.
- DOT-4 brake fluid: The Honda Fury calls for DOT-4 brake fluid.
- Screw driver: To remove the screws on top of the master cylinder.
- Small siphon or syringe: You can reduce how much old brake fluid you’ll have to drain out the bottom, but sucking out fluid from the top.
- Empty bottle that seals tightly: For getting rid of the old brake fluid.
- Rags: Stuff to keep your bike protected from the DOT-4 brake fluid, like rags, or maybe even tape.
- This Black Widow motorcycle table lift isn’t necessary but it sure made the job easy and it wasn’t too expensive (full review here).
You can change the brake fluid on a Honda Fury yourself in these five steps:
- Remove the covers, lids, and diaphragms to access the master cylinder reservoirs
- Suck out old fluid with a siphon, syringe, or turkey baster
- Refill brake fluid reservoir with new DOT-4 brake fluid
- Bleed the brakes (follow the process detailed below)
- Repeat the process on the other brake (front or rear)


How to bleed the brake fluid on a Honda Fury
Changing your brake fluid yourself can save you a lot of time and it might even save you your life. There’s no reason to have old brake fluid in your Fury. Here’s how to bleed your brakes to help maintain your Fury’s ABS system and help maximize your stopping power.
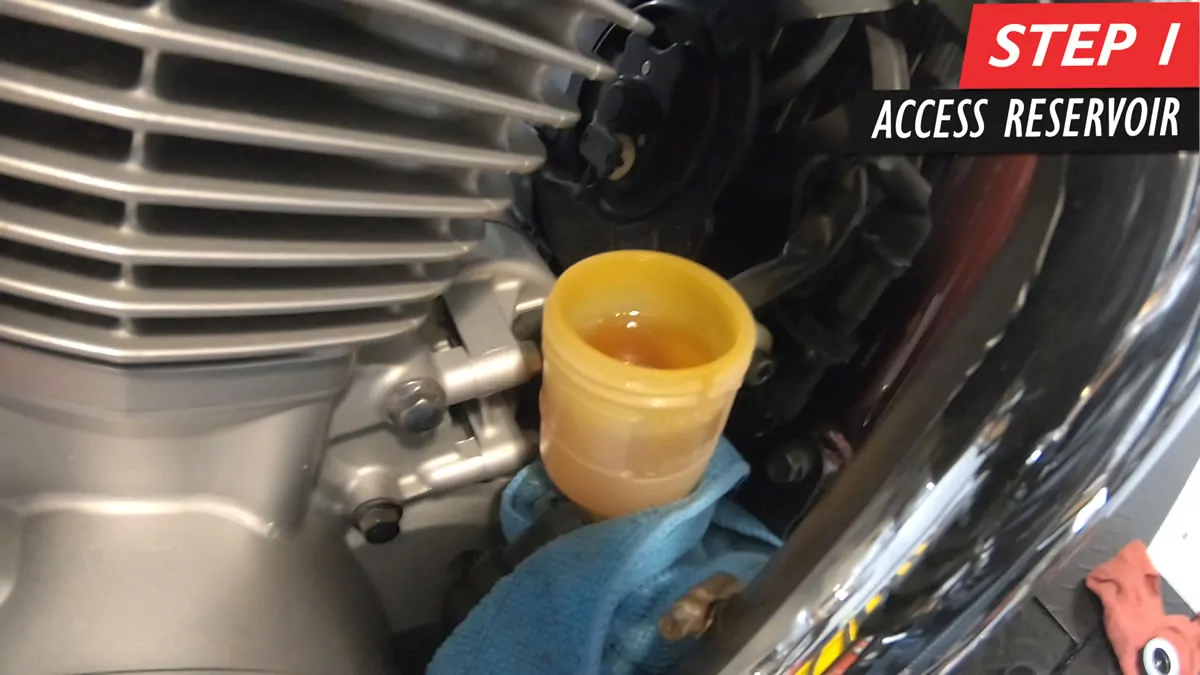
1) Remove the covers, lids, and diaphragms to access the master cylinder reservoirs
To start with the rear brake cylinder, you’ll want to find the rear master cylinder, which is located under the motorcycle’s tank, by your right foot.
Remove the bolt that holds the master cylinder cover in place, remove the cover, twist the lid off, remove the diaphragm. You now have access to the brake fluid in the reservoir.
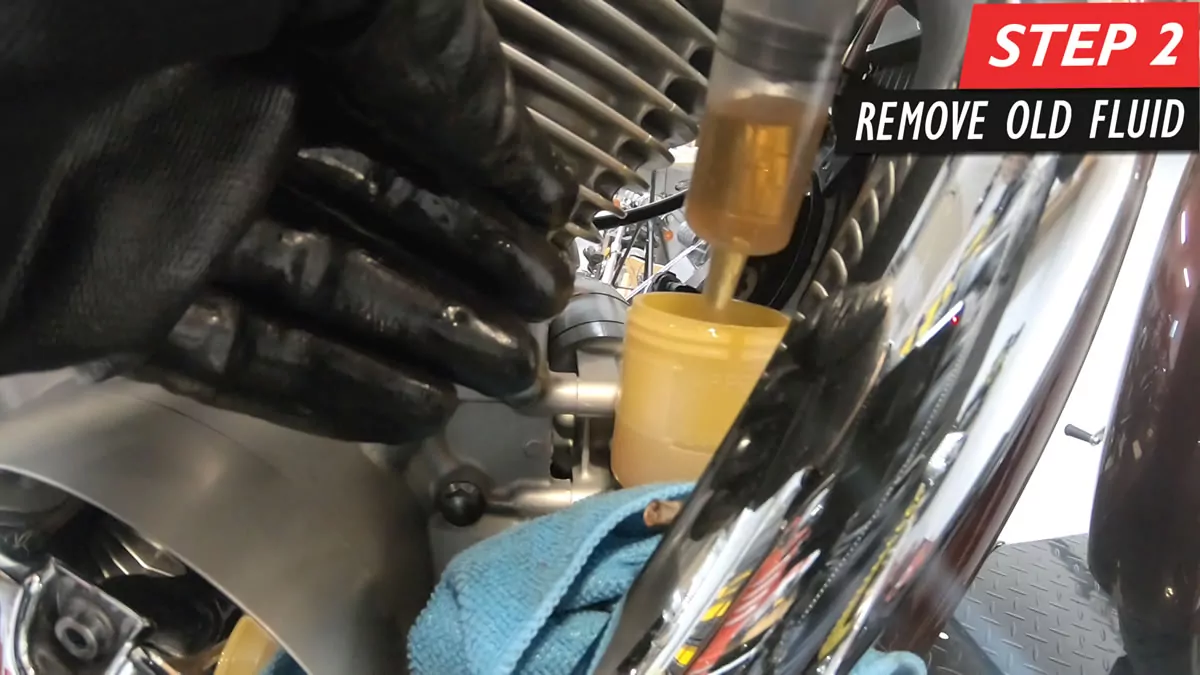
2) Suck out old fluid with a siphon, syringe, or turkey baster
If you have an old turkey baster, an automotive syringe, a siphon, or anything similar, you can sleep up the process by sucking some of the old brake fluid out of the master cylinder.
Suck out the old brake fluid and take note of the color. Be careful not too suck out too much and uncover the hole at the bottom that the brake fluid goes down. Doing that would let air into the system and will make more work for you later. Never let the brake fluid go too low.

3) Refill brake fluid reservoir
Refill the brake fluid reservoir with fresh new DOT-4 brake fluid. Remember that brake fluid is extremely corrosive, so you’ll want to take steps to prevent any from getting on your motorcycle.
Make sure the keep the brake fluid level between the minimum and maximum level in the reservoir. You should also only use a new bottle of brake fluid, as brake fluid is hygroscopic, meaning it absorbs water from the atmosphere if left unsealed.
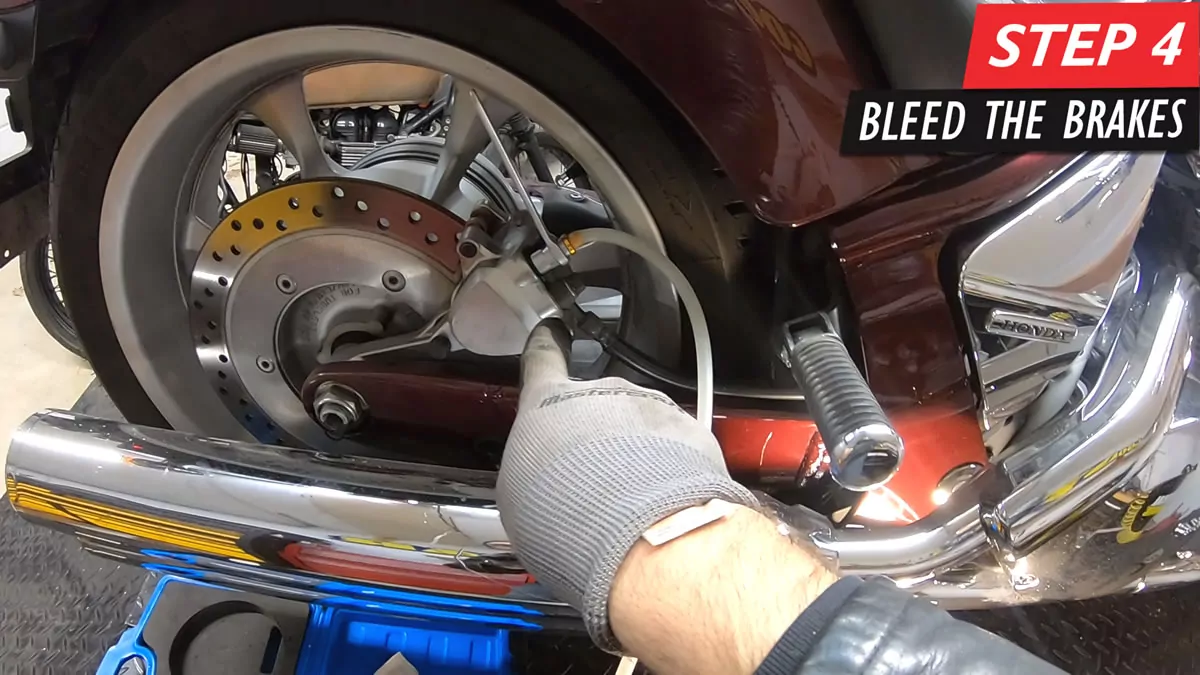
4) Bleed the brakes
Admittedly, this is a process that you’re probably better off learning from watching the video above, than from reading, but here it goes:
First remove the dust cover over the brake caliper’s bleeder nipple.
Next, attach the wrench from the brake bleeder kit and connect the hose to it. The arrow on the one-way valve should be pointing down, away from your Honda Fury. This allows fluid to flow out of the motorcycle without allowing air to flow back into it, which would otherwise make your brake bleeding procedure take a lot longer.
Your goal is to get the old motorcycle brake fluid out (along with any air bubbles that might be in the line) out through the brake line, without allowing any air into the system.
To do this you’ll keep the brake fluid reservoir topped up, and continue to bleed the brakes until you see no bubbles in your hose and a noticeable difference in color in the fluid coming out.
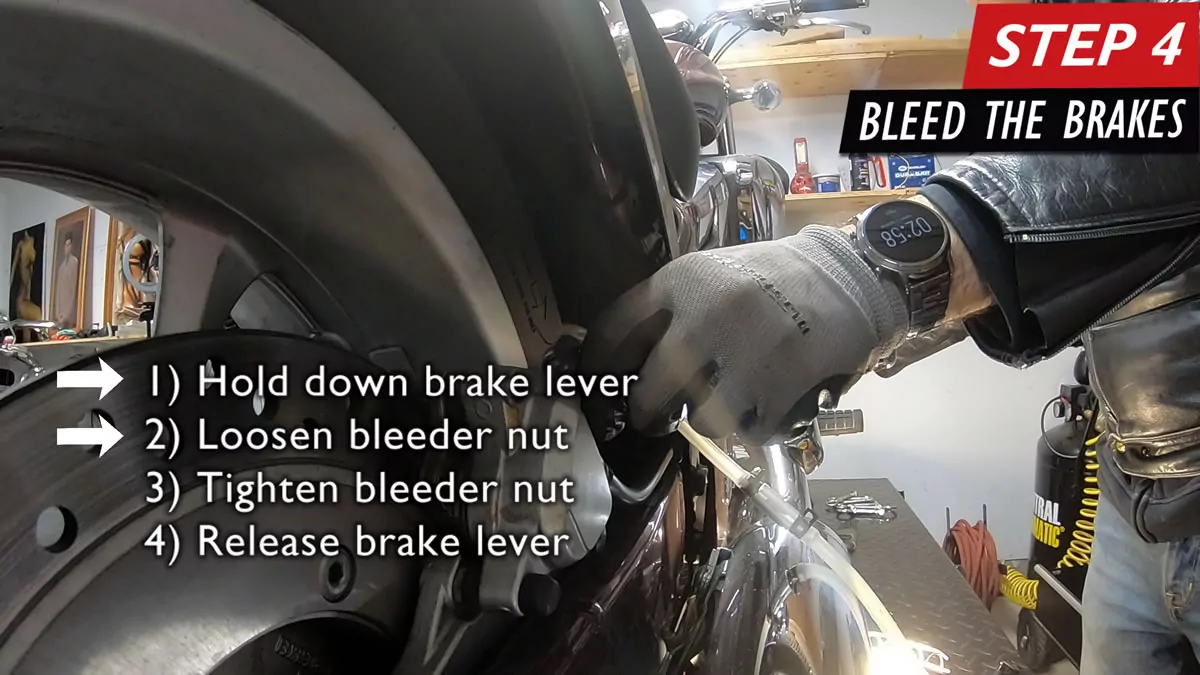
The process of bleeding the brakes is as follows:
- Press the brake lever down and hold it down, don’t let go. This puts pressure in the system.
- Turn your wrench from the brake bleeder kit around the bleeder nipple to open it up. The pressure from holding the brake lever down will push old brake fluid out of the system.
- Turn your wrench back to tighten the bleeder nipple back shut the bleeder after you’ve gotten some brake fluid out.
- Release the brake lever to let fresh brake fluid from the reservoir to enter the fuel line.
- Repeat until the brake fluid comes out clear and without any bubbles.
Honda Fury brake fluid change special notes:
- You’ll need to add new brake fluid along the way as more and more old fluid enters the system. Keep an eye on the brake fluid reservoir and keep topping it up to maintain the brake fluid level between min. and max.
- If this is your first time flushing brake fluid, I recommend starting with the rear brakes first, and then your front brakes. The rear brakes are a little easier to deal with while you get used to the process.
- If you don’t follow the above instructions direction, you could introduce air into your brake system which could negatively impact braking and be disastrous if you don’t get it out.
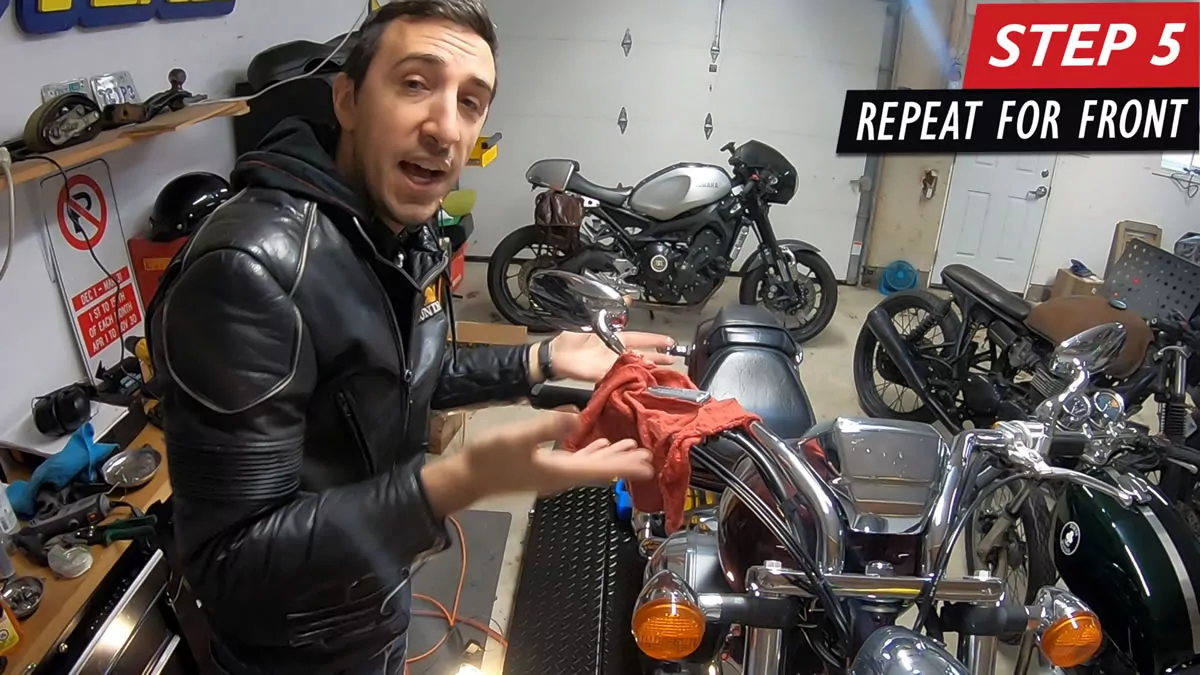
5) Repeat the process for the other brake lever
Once you’ve done with one of the brakes, put everything back together, including: the dust cover on the brake bleeder nipple, the diaphragm in the brake fluid reservoir, the caps, lids, and covers as applicable, etc.
When you’re done doing one lever (rear brake or front brake), you can go ahead and repeat the process for the other lever (front brake or rear brake).
Now you know how to bleed the brakes on your Honda Fury. You can apply this to any motorcycle with a similar single disk-brake setup.
COMMENTS: Was this helpful? Do you have any questions? Please leave a comment below and let me know!
You might also be interested in the following Honda Fury articles and videos:
 Honda Fury Shaft Drive Oil Change (Final Drive Oil Change)


Cheers for this vid! Top-notch mate! 🇬🇧👍
I’ve watched every Fury vid and appreciate what you’re putting out. Can I suggest making vids for locating and removing/installing the flasher relay and/or ECM? Did these and had no YouTube vid for reference, only the service manual, which was helpful but a vid would’ve been awesome. Keep up the good work!